Today I bring you a totally awesome free knitting pattern for a cat bed.
Well, it is a pattern of sorts. I spent around 4 hours, maybe more, knitting this cat bed last night, making it up as I went along.
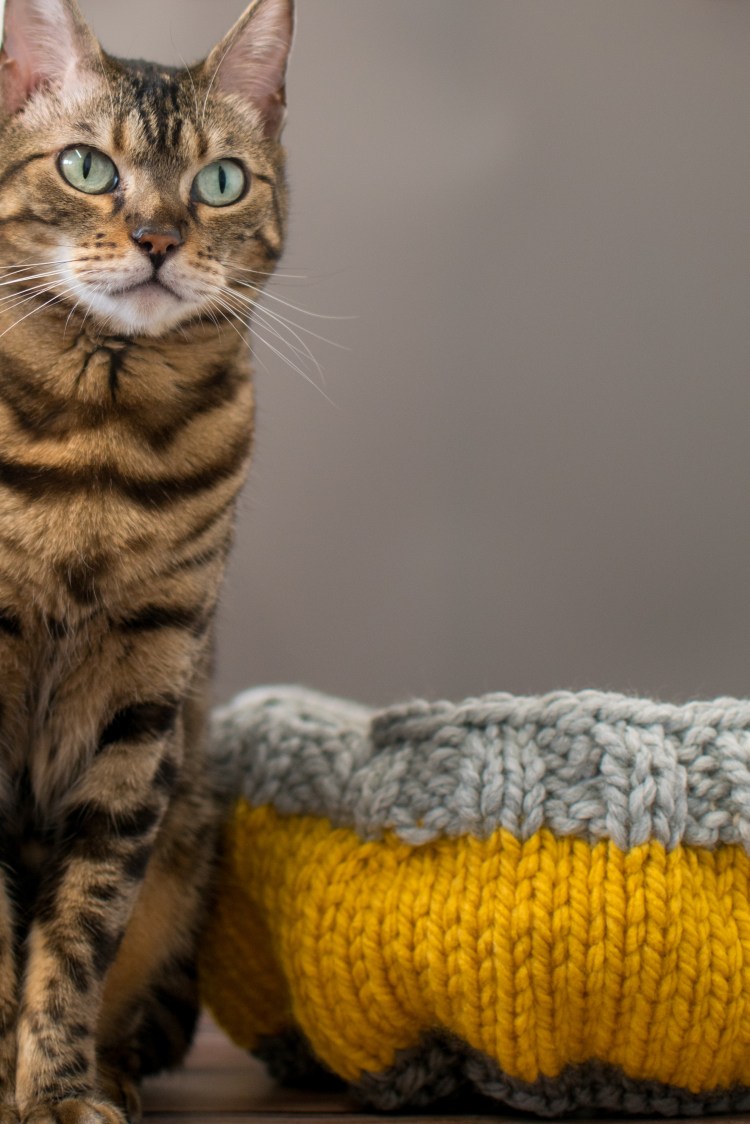
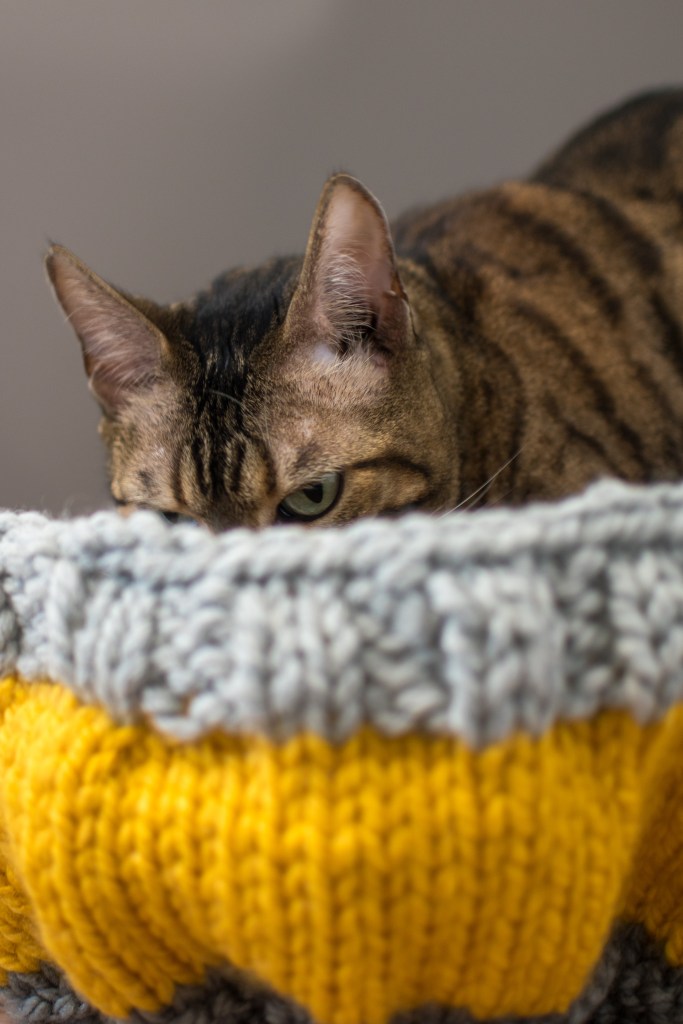
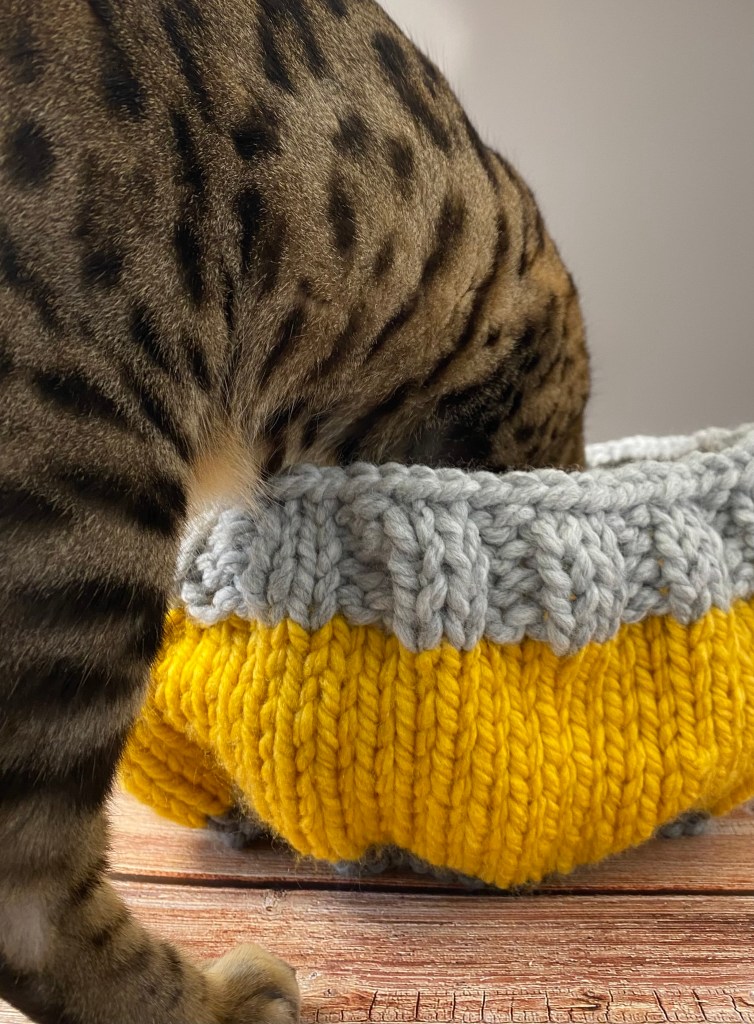
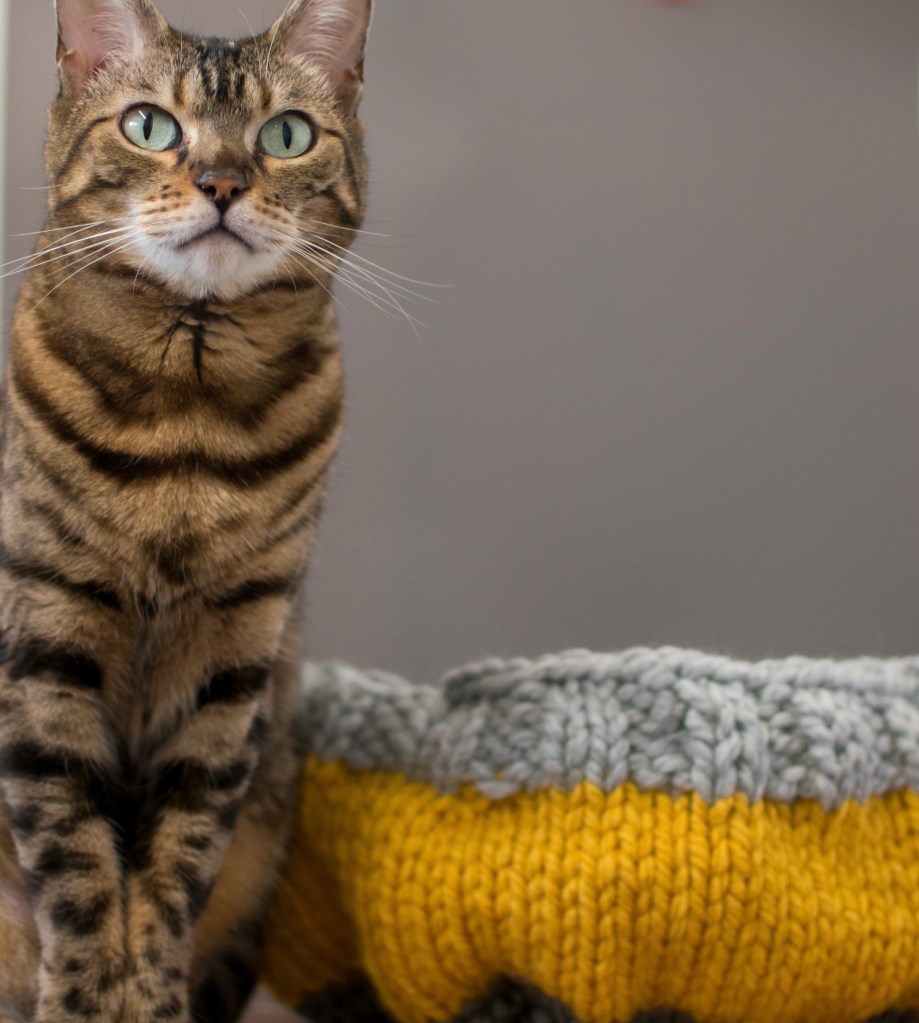
My lovely bengal cat reviewed the bed and you will see the results later in this article.
I have left the cat bed out and will see if we have more luck later. I envisage the knitted cat bed being an excellent knitting project storage basket 🙂
Anyway, whatever use you find for this cute hand knit cat bed, it is quick and easy to knit and can be made in any colour to match your home decor. I hope you enjoy the pattern and please don’t let the (slightly bad) cat reviews put you off knitting it.
What you need to knit the cat bed
Contains affiliate links.
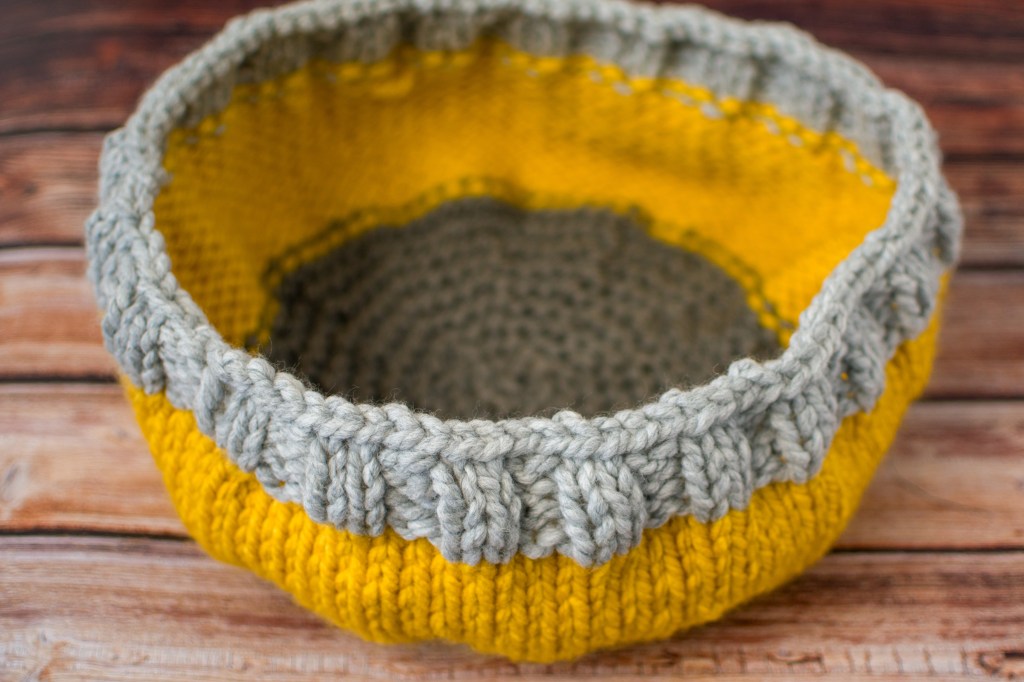
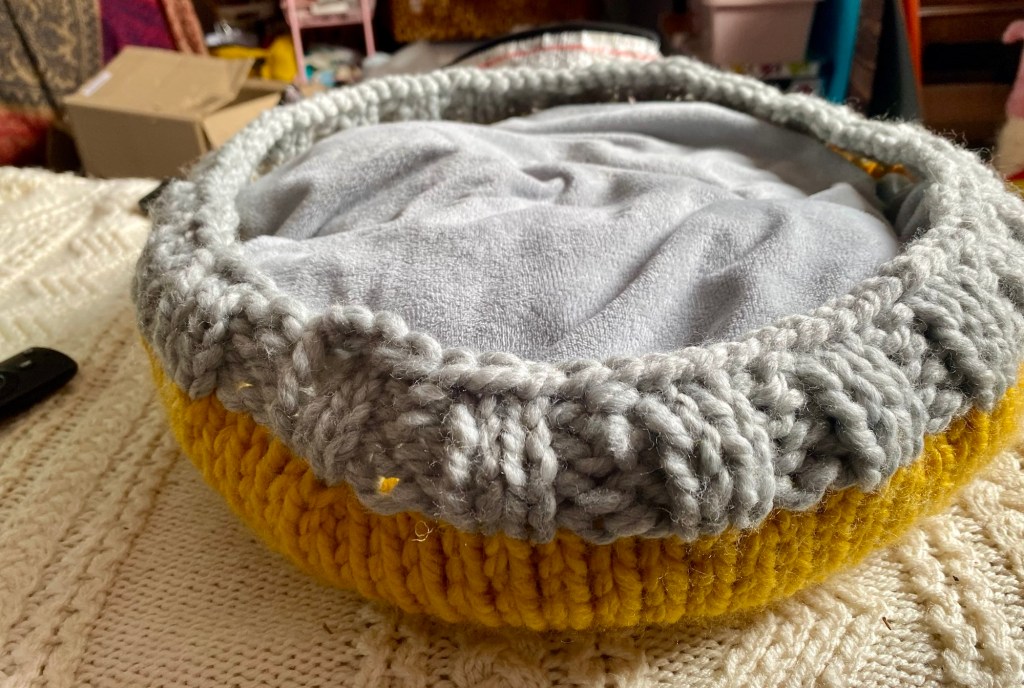
The cat bed is made from 3 colours of super chunky yarn. It weighs just under 300g and I had a 100g ball of each of 3 colours available. The mustard colour was completely used up. The yarn that I used was Paintbox Yarns Simply Super Chunky. For USA cat lovers, I would suggest Lion Brand Thick and Quick. Both of these yarns are on sale as I write this – however this may of course change.
To knit the cat bed you will also need 9mm knitting needles. Now using this size needle will make your fabric stiffer and I will admit it was quite heavy going on the hands. I used a hybrid of straight and circular needles because I found that using double pointed needles to create the base of the bed was really hard work.
The base was therefore knit with straight 9mm needles and I then joined in 9mm 60cm long circulars for the body of the bed.

You will also need a suitable needle for sewing up and a pair of scissors.
Cat Bed Knitting Pattern
Ok, so this is is how I knit the cat bed.
With the straight 9mm needles (they need to be at least 35cm long) and the first colour, cast on 3 stitches.
Now work the following 19 rows to create the base of the cat bed. Kfb means knit into the front and back of the stitch, thus increasing by one.
- kfb x 3
- k
- *kfb* across row (12)
- k
- *k1, kfb* across row (18)
- k
- *k1, kfb* across row (27)
- k
- *k2, kfb* across row (36)
- k
- *k2, kfb* across row (48)
- k
- *k3, kfb* across row (60)
- k
- *k2, kfb* across row (75)
- k
- *k2, kfb* across row to last 3 stitches, k3 (93)
- k
- k2tog, k43, k2tog, k44, k2tog (90)
Now change to the next colour and begin to use the 9mm circular knitting needle. 60cm long needle is perfect for the cat bed.
You will now K every row, thus forming stocking stitch, joining in the round after the first row. If you wish you can continue on the straight needles and sew up your bed at the end. If working straight, work stocking stitch (k 1 row, p 1 row).
So work stocking stitch (k every round if working in the round) until the stocking stitch piece measures 10cm.
After a couple of rounds I decided to sew up the base. To do this, simply sew through the garter stitch loops at the edges and form a circle. If you look at the previous photo you can just see where I sewed up the base of the cat bed.
Now change to colour 3. Work this one decrease row:
k2tog, k to last 2 stitches, k2tog (88).
Now work 2 x 2 rib for 4 rounds (k2, p2),
Cast off in knit stitch.
Sew in all your ends, tightening any holes using yarn ends as you weave. If you haven’t already done so you will need to sew up the base of the cat bed – this was mentioned previously.
And that’s it – a one evening cat bed knitting project. You could improve the shape by washing it and then leaving to dry with something like another bowl inside it. I quite like the rustic look as it is and left out the blocking/shaping stage (also I am somewhat of an impatient knitter).
Put your cat bed out for your cat and see them reject it.
OR your cute little fur ball might actually like it, in which case go you, hurrah!
Let me know and make me smile :).
Thanks so much for reading this article about how to knit a cat bed I hope you enjoyed it.
And now for the best bit – a real life cat review in pictures.

Update- I added a small cushion inside the knitted cat bed and now it is happily sat in 🙂 the cat bed also looks really good with a bit of a cushion pad inside.


I’m currently working on this and I believe there are errors in the directions for rows 15 and 17. I think the math only works out if you start with K3, not 2. I hope this helps!
LikeLike
Oh really thank you I will have a look and amend the pattern thank you
LikeLike