
Today I have a very cute pair of baby booties free knitting pattern to share.
The booties are quite easy to knit using only garter stitch (knit every row).
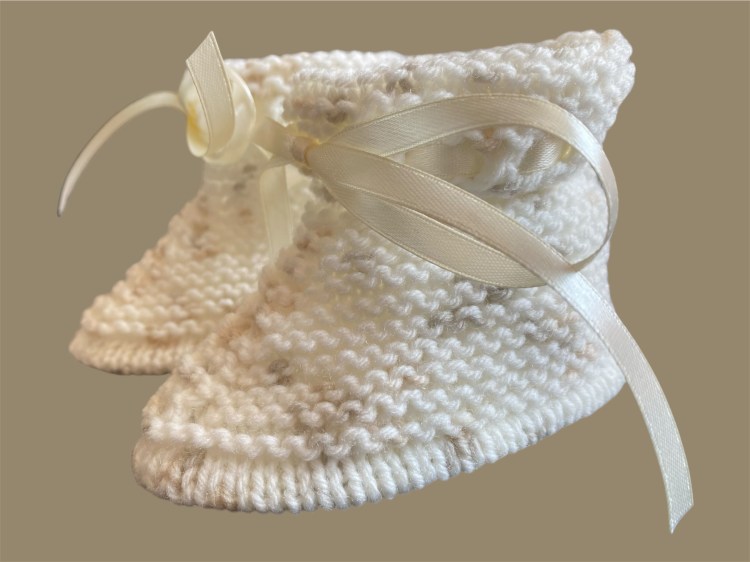
To add interest to the booties, there is a lovely tuck fold feature at the base. This feature also adds a great structure to the boots..
Before we get to the free baby booties knitting pattern, here is some information about knitting a tuck fold.
This article contains some affiliate links.
What is a tuck fold in knitting?
A tuck fold is a decorative technique in knitting that creates a raised ridge or folded edge on the fabric. It adds texture and visual interest, often used to imitate a pleat or add a layered, three-dimensional effect. Tuck folds are commonly found in vintage or retro patterns, baby garments, and decorative trims. They can be purely ornamental or serve a functional role, like creating a hem or edge that holds its shape.
Why is a tuck fold used?
- Decorative detail: It gives the appearance of a sewn pleat or band, adding charm to baby knits or retro jumpers.
- Structure: A tuck fold can reinforce an edge or act as a built-in hem. This is especially useful when you want a neat finish without sewing.
- Dimension: It lifts the surface of the fabric, making an otherwise flat knit more interesting.
How to knit a tuck fold:
There are a few different ways to knit a tuck fold, but here’s the most common method:
- Knit your piece to the point where you want the tuck to be. This is usually done after working a few centimetres of fabric.
- Mark the row below where you want the tuck to fold back to. For example, if you want a tuck that’s 5 rows deep, you’ll be folding row 6 to row 1.
- Fold the knitting so the live stitches on your needle align with the row you’re tucking to. This is usually a purl ridge or a line of stitches from a garter or stocking stitch row below.
- Pick up a stitch from the corresponding row below and knit it together with the live stitch on your needle. Repeat across the row.
Working in this way creates a folded edge where the fabric doubles back on itself and is joined internally, forming a neat tuck.
When I first learned how to make a tuck fold in knitting, I found this YouTube video super useful. Please note this is not my video, just one that I found helpful.
So, that’s some information about making tuck folds in knitting. Let’s move onto the free baby booties knitting pattern!
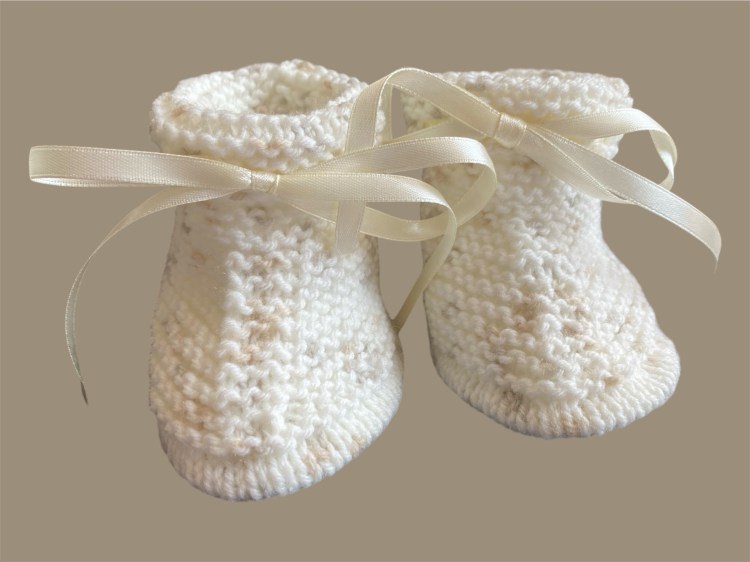
Tuck Fold Baby Booties Free Knitting Pattern
These booties are quite generous in size. I used a 3.5mm needle, and I would say they will fit 0-9m approximately depending on baby’s foot size. You could use a 3mm knitting needle for a bootie that is more snug.
Use DK (8 ply) yarn, you only need around 30g, probably less. Use any DK yarn.
I knit my booties in a lovely, dotty baby yarn called Emu Little Dots. I purchased this wonderful, very soft baby yarn here at The Knitting Network.
Here are the instructions to make these super cute baby booties. The materials needed have been listed above. You will also need a length of narrow ribbon (mine is 6mm wide), a wide eyed needle for sewing and threading the ribbon through the eyelet holes, and some scissors.
Tension:
The booties shown were made using the following tension:
Over 5 cm on 3.5mm knitting needles in garter stitch: approx 5 stitches and 8 rows.
Abbreviations:
- K – knit.
- P – purl.
- Yfwd – yarn forward. Place the yarn at the front of the work as if to purl, but you will then knit. This creates a hole in lace knitting.
- M1 – make 1 stitch. Locate the bar between stitches, place on the right hand needle and knit into the back of it.
- K2tog – knit 2 stitches together.
- Sl1k – slip 1 stitch knitwise.
- Psso – pass the slipped stitch over the previous knitted stitch.
- stitches from the main needle, and then knit the 2 stitches on the cable needle.
Instructions:
Using 3.5mm (or your choice) knitting needles, cast on 31 stitches.
Work the following row by row instructions:
Soles of booties
- K
- K1, m1, k14, m1, k1, m1, k14, m1, k1 (35)
- K
- K1, m1, k16, m1, k1, m1, k16, m1, k1 (39
- K
- K1, m1, k18, m1, k1, m1, k18, m1, k1 (43)
- K
- K1, m1, k20, m1, k1, m1, k20, m1, k1 (47)
- K
- K1, m1, k22, m1, k1, m1, k22, m1, k1 (51)
- K
- P
- K
- P
- K
- P
Next row (make the tuck fold):
*knit together one stitch from the needle and one stitch from the first row of the stocking stitch worked on rows 11-16.
Repeat from * to the end of the row.
Work 3 rows of garter stitch (k every row).
Shape Toe
Follow the row by row instructions:
- K23, k2tog, k1, sl1k, k1, psso, k23 (49)
- K
- K22, k2tog, k1, sl1k, k1, psso, k22 (47)
- K
- K21, k2tog, k1, sl1k, k1, psso, k21 (45)
- K
- K20, k2tog, k1, sl1k, k1, psso, k20 (43)
- K
- K19, k2tog, k1, sl1k, k1, psso, k19 (41)
- K
- K18, k2tog, k1, sl1k, k1, psso, k18 (39)
- K
- K17, k2tog, k1, sl1k, k1, psso, k17 (37)
- K
- K16, k2tog, k1, sl1k, k1, psso, k16 (35)
Work 19 rows of garter stitch (k every row).
Make eyelet: k2, *yfwd, k2tog; repeat from * to last stitch, k1.
Cast off knitwise.
Make up the booties
- Join the back seam.
- Join the foot seam.
- Sew in loose ends.
- Fold over at the ankle and thread ribbon through the holes.
I hope you enjoyed this free tuck fold baby booties knitting pattern.
If you like my knitting patterns, I have some paperbacks available here on Amazon. Many of these knitting patterns are also available for free if you have Kindle Unlimited.


One thought on “Easy Baby Booties Knitting Pattern Featuring Tuck Folds”